MODBUS RTU
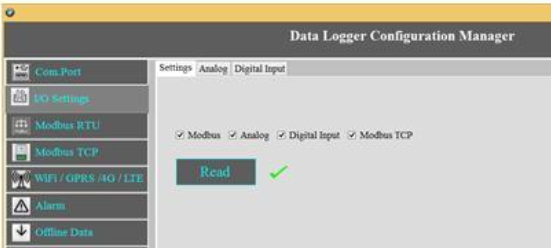
Select the check box![]() for enabling the MODBUS and Click on Save button.
for enabling the MODBUS and Click on Save button.
Com Port Settings
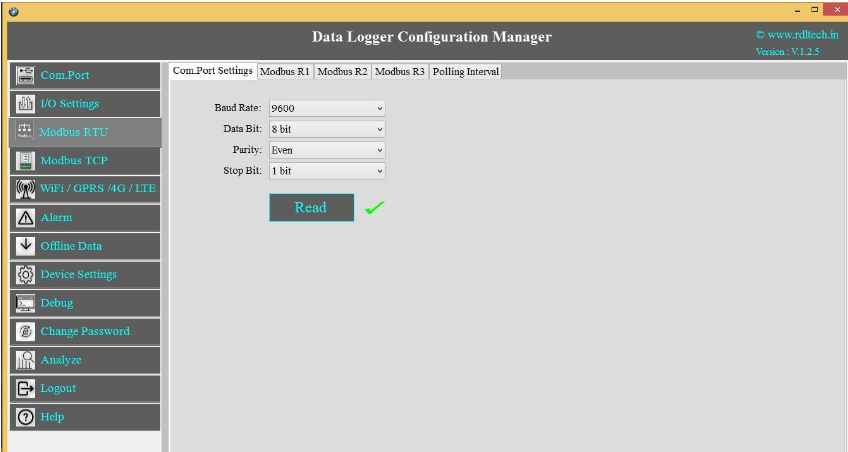
1.Click on MODBUS RTU from the side bar menu
2.Click on Read to know the previous stored Configuration.
3.Click on Com Port Settings
a. Select Baud Rate from the dropdown.
b. Select Data Bit from the dropdown.
c. Select Parity from the dropdown.
d. Select Stop Bit from the dropdown.
e. Click on Save button.
f. Click on Read to display the configuration that is already saved., will display the configuration that is already saved.
Based on Meter/Slave type the register polling classified in three Bank R1, R2 and R3.
R1 Register Bank meant for reading maximum 10 slave devices and maximum register length of 100 for each slave.
R2 Register Bank meant for reading maximum 32 similar slave /meters with 30 register length for each slave/meter
R3 Register Bank meant for reading maximum 10 devices with 100 register length for each slave devices and all slaves can be set for different polling time.
NOTE:Maximum 1000+ tags can be polled by combining R1, R2, and R3 Register Banks
MODBUS R1

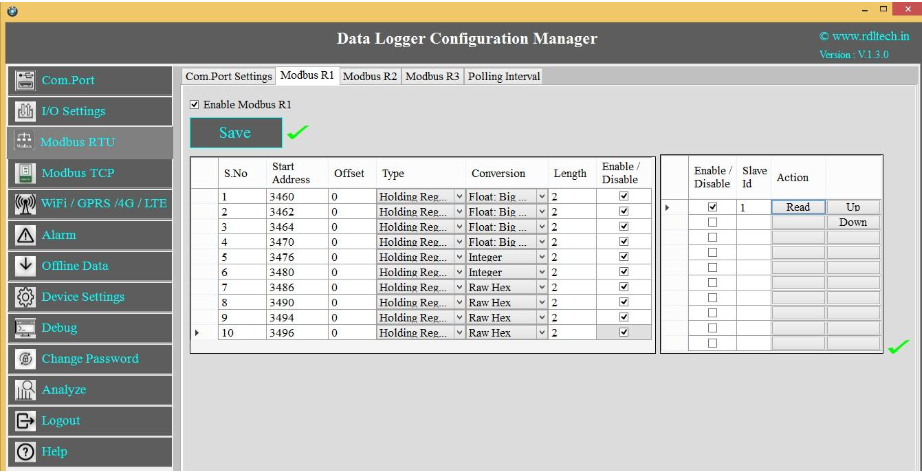
1.Click on the check box![]() to enable MODBUS Register Bank R1, and click on Save button.
to enable MODBUS Register Bank R1, and click on Save button.
2.Enter MODBUS Register details as shown above
3.Enter MODBUS credential.
4.R1 Register Bank supports 10 slave devices for each slave you can configure max length up to 100 register.
5.Select Enable/Disable check box![]() to poll the register.
to poll the register.
6.Click on Save button.
MODBUS R2
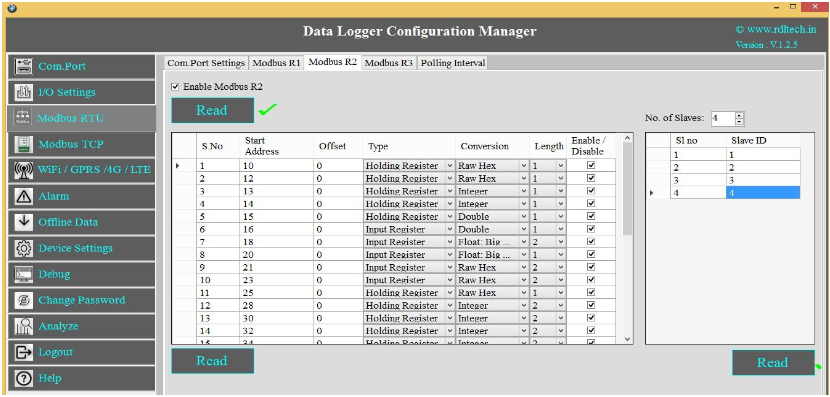
1. Click on the check box![]() to enable MODBUS Register Bank R2, and click on Save button.
to enable MODBUS Register Bank R2, and click on Save button.
2. Enter MODBUS credential as shown above.
This supports for 32 similar slaves/meters with 30 registers length for each slave/meter
3. Select Enable/Disable check box![]() to poll the register
to poll the register
4. Click on Save button.
NOTE:In R2, Address configuration is same for multiple slaves; it has only facility to change Slave ID of each device.
MODBUS R3

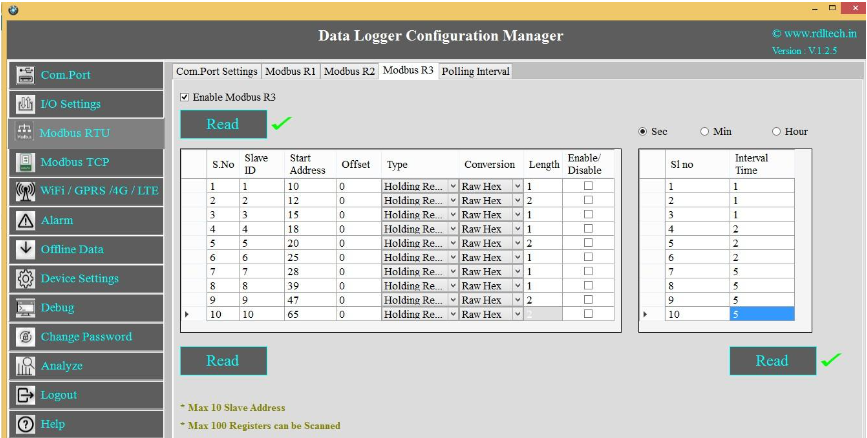
1.Click on the check box![]() to enable MODBUS Register Bank R3, and click on Save button.
to enable MODBUS Register Bank R3, and click on Save button.
2.Enter MODBUS credential as shown above.
This supports 10 slaves, for each slave 10 start registers are available and for each start register configure up to 100 lengths.
3.R3 has the facility to add polling time for each slave ID.
4.Select Enable/Disable check box![]() to poll the register.
to poll the register.
5.Click on Save button.
MODBUS RTU Polling Interval
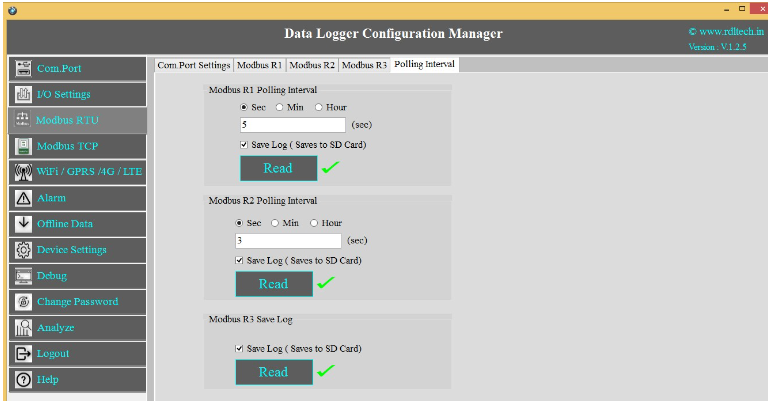
- Select the Polling Interval sec/min/hour.
- Set the MODBUS Polling Interval.
- Click on check box
 to Save the Log.
 - Click on Save button to save the above configuration.
- Click on Read to display the configuration that is already saved.
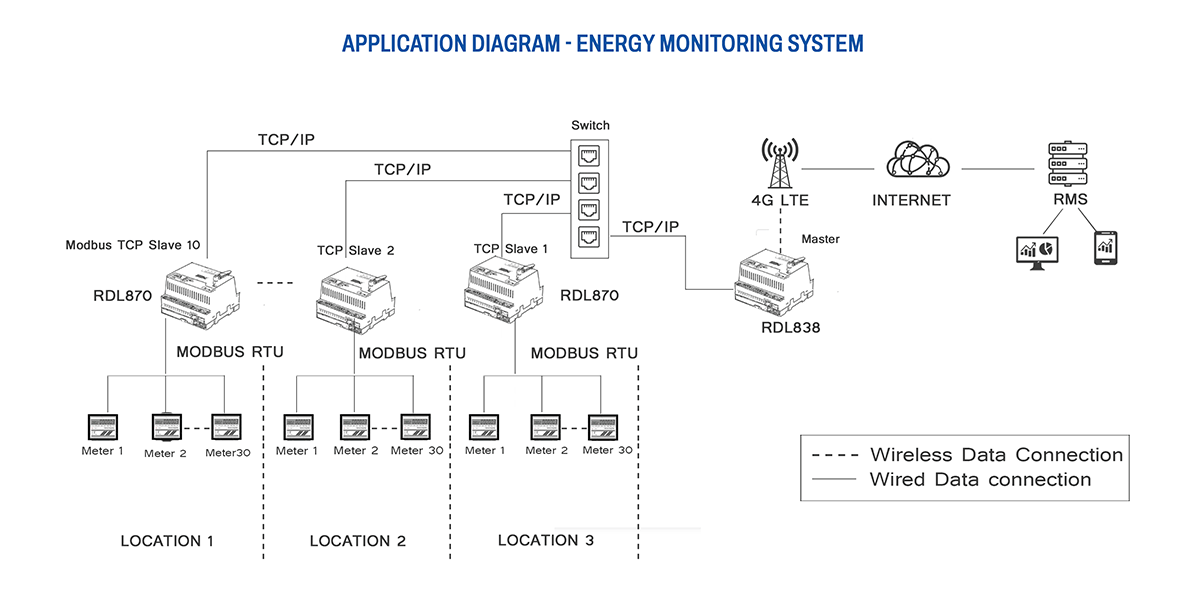
Application Wiring Diagram