


Setting up MQTT Broker on SSL Implementation
Mainly 2 steps
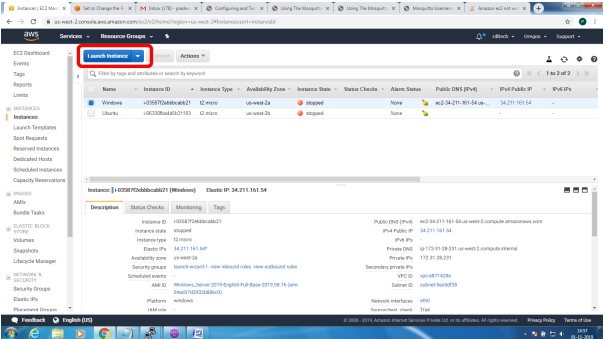
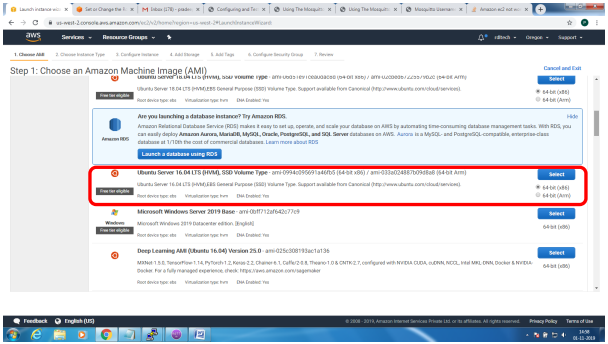
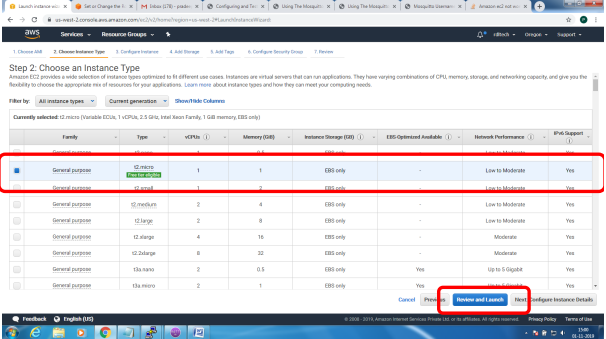
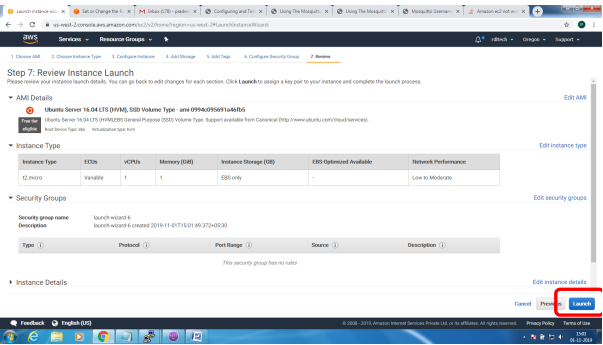
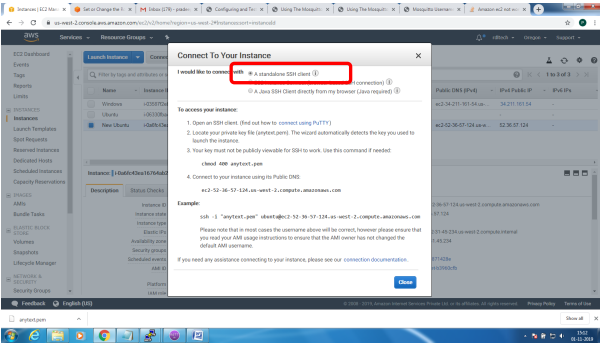
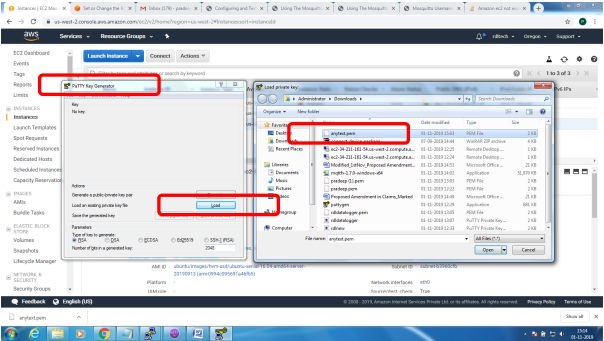
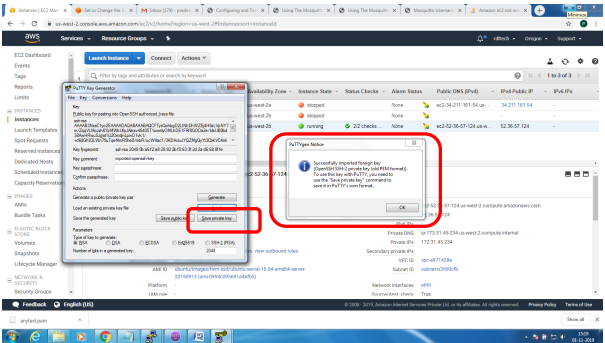
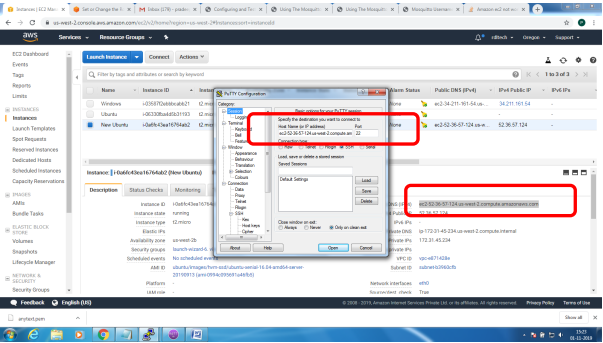
1. Bring up EC2 Linux System
2. Install mosquitto on the above system
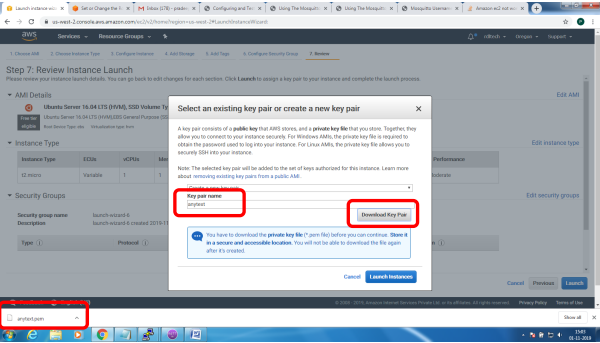
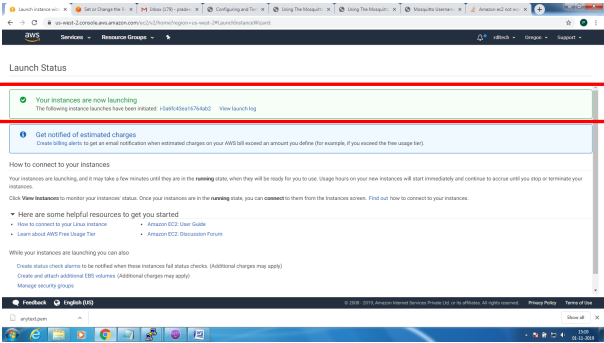
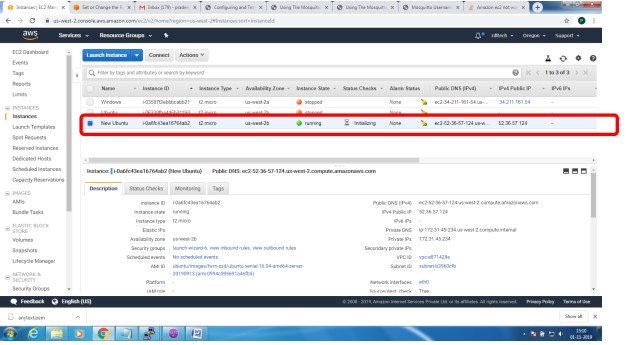
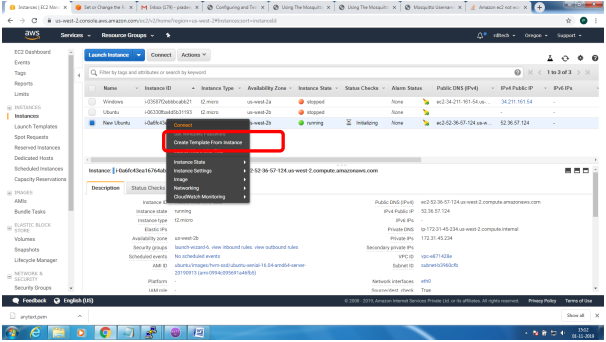
Bring up EC2 Linux System

Installation of mosquitto on linux system
Follow the below steps to install mosquitto
- sudo apt-add-repository ppa:mosquitto-dev/mosquitto-ppa
- sudo apt-get update
- sudo apt-get install mosquitto
- sudo apt-get install mosquitto-clients
Follow the below steps to Enable user authentication
- Create a txt file in the following format
- Username:Password
- Issue the following commands to add certificate to this file
- mosquitto_passwd -U passwordfile (text file name)
- Copy this file to /etc/mosquitto
Open mosquiito.conf and add these 2 lines to enable user authentication
allow_anonymous false
password_file etc\mosquitto\passwords.txt
Restart the broker to absorb the changes
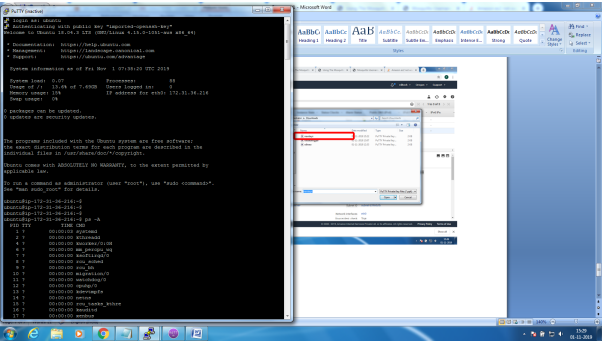
ubuntu@ip-172-31-36-216:~$ mosquitto -v
1572603369: mosquitto version 1.6.7 starting
1572603369: Using default config.
1572603369: Opening ipv4 listen socket on port 1883.
Error: Address already in use
To resolve this
ps –ef | grep mosquitto
kill -9 pid
mosquitto_sub -t '$SYS/#' –v
or
root@ip-172-31-36-216:/home/ubuntu# mosquitto
1572603616: mosquitto version 1.6.7 starting
1572603616: Using default config.
1572603616: Opening ipv4 listen socket on port 1883.
1572603616: Opening ipv6 listen socket on port 1883.
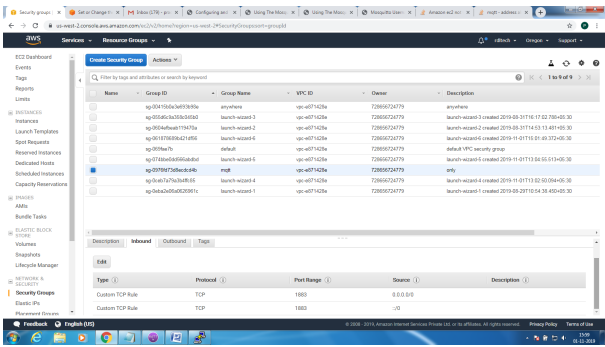
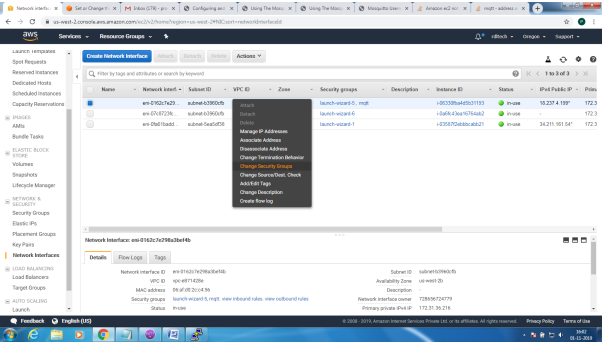
To enable Message flow on to AWS ES2 system, follow the below steps
Create Security Group to allow TCP/1883 traffic in the inbound direction
Mosquitto SSL Configuration -MQTT TLS Security
Server Side:
Openssl tool is used to generate the required keys and certificats for both the server and client
Issue the following commands in sequence and make changes to the mosquitto.conf on the server
for the changes to take effect
1. openssl genrsa -des3 -out ca.key 2048
2. openssl req -new -x509 -days 1826 -key ca.key -out ca.crt
3. openssl genrsa -out server.key 2048
4. openssl req -new -out server.csr -key server.key
5. openssl x509 -req -in server.csr -CA ca.crt -CAkey ca.key -CAcreateserial -out
server.crt -days 360
The directory file listing would look similar to the below
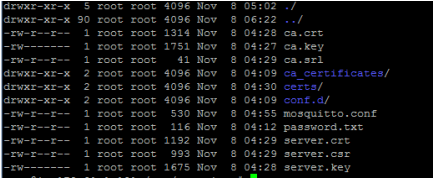
Copy the ca.crt, server.crt and server.key file to /etc/mosquitto/cert folder
Make the following changes to the mosquitto.conf file
Add the following lines
Port 8883
Cafile /etc/mosquitto/certs/ca.crt
Keyfile /etc/mosquitto/certs/server.key
Certfile /etc/mosquitto/certs/server.crt
Most important step is to copy the ca.crt on to the client system.
Incase its get challenging to transfer this file, as it would from AWS EC2 environment. Please use
notepad+ (not plain notepad) to copy paste the certificate contents
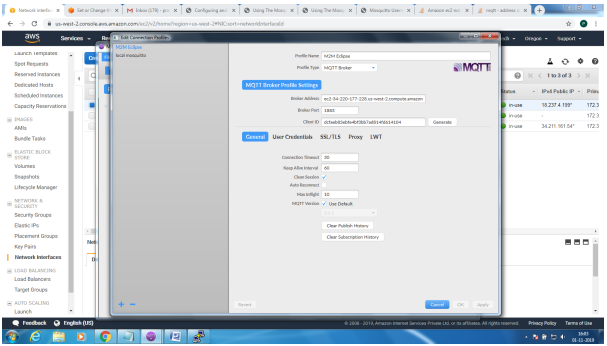
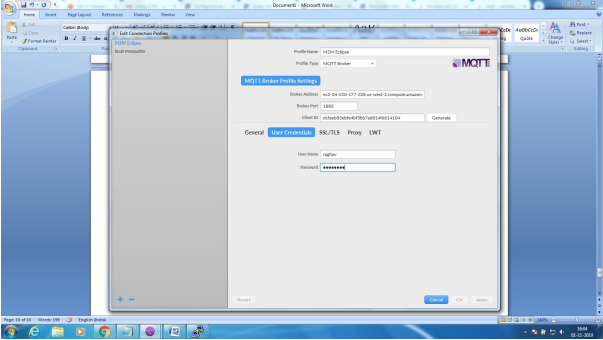
Client Side: Configure the MQTT Client with the broker address, enable SSL and point to the ca.crt
file and connect for application